How to Install Low Voltage Bushing Supports
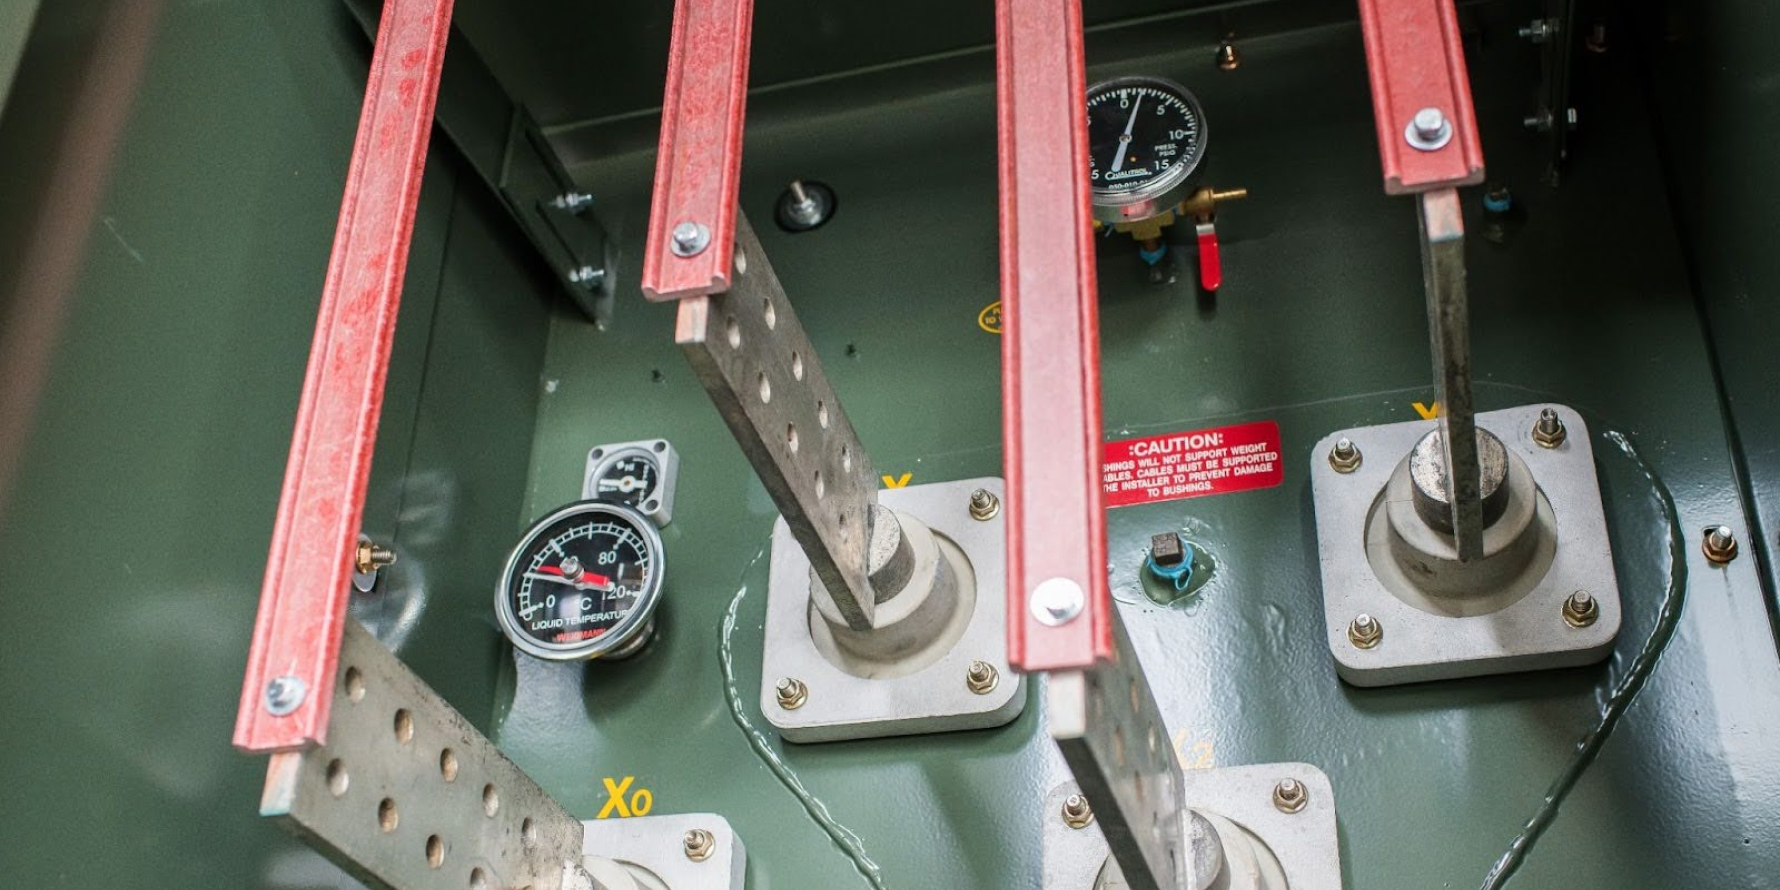
Low voltage bushing supports reduce tension on spades with multiple cables. Learn how to prepare and install supports on your transformer.
December 19, 2024
How To's
Cables connect low voltage transformer bushings to loads. Smaller loads may only have one cable per bushing. Larger loads require more cables. LV bushings usually have several holes for multiple cables. The size of the padmount transformer will dictate how many holes are typically provided at each LV bushing.
Why Install Low-voltage Bushing Supports?
The more holes, the longer the low voltage spade. Spades with multiple holes and cables will require LV bushing supports. You may also want to consider bushing supports if you are using spade extensions.
Too many heavy cables can weigh an unsupported bushing down. This weight can crush the bottom part of the bushing gasket between the tank wall. Over time this can lead to transformer oil leaks from the top of the gasket.
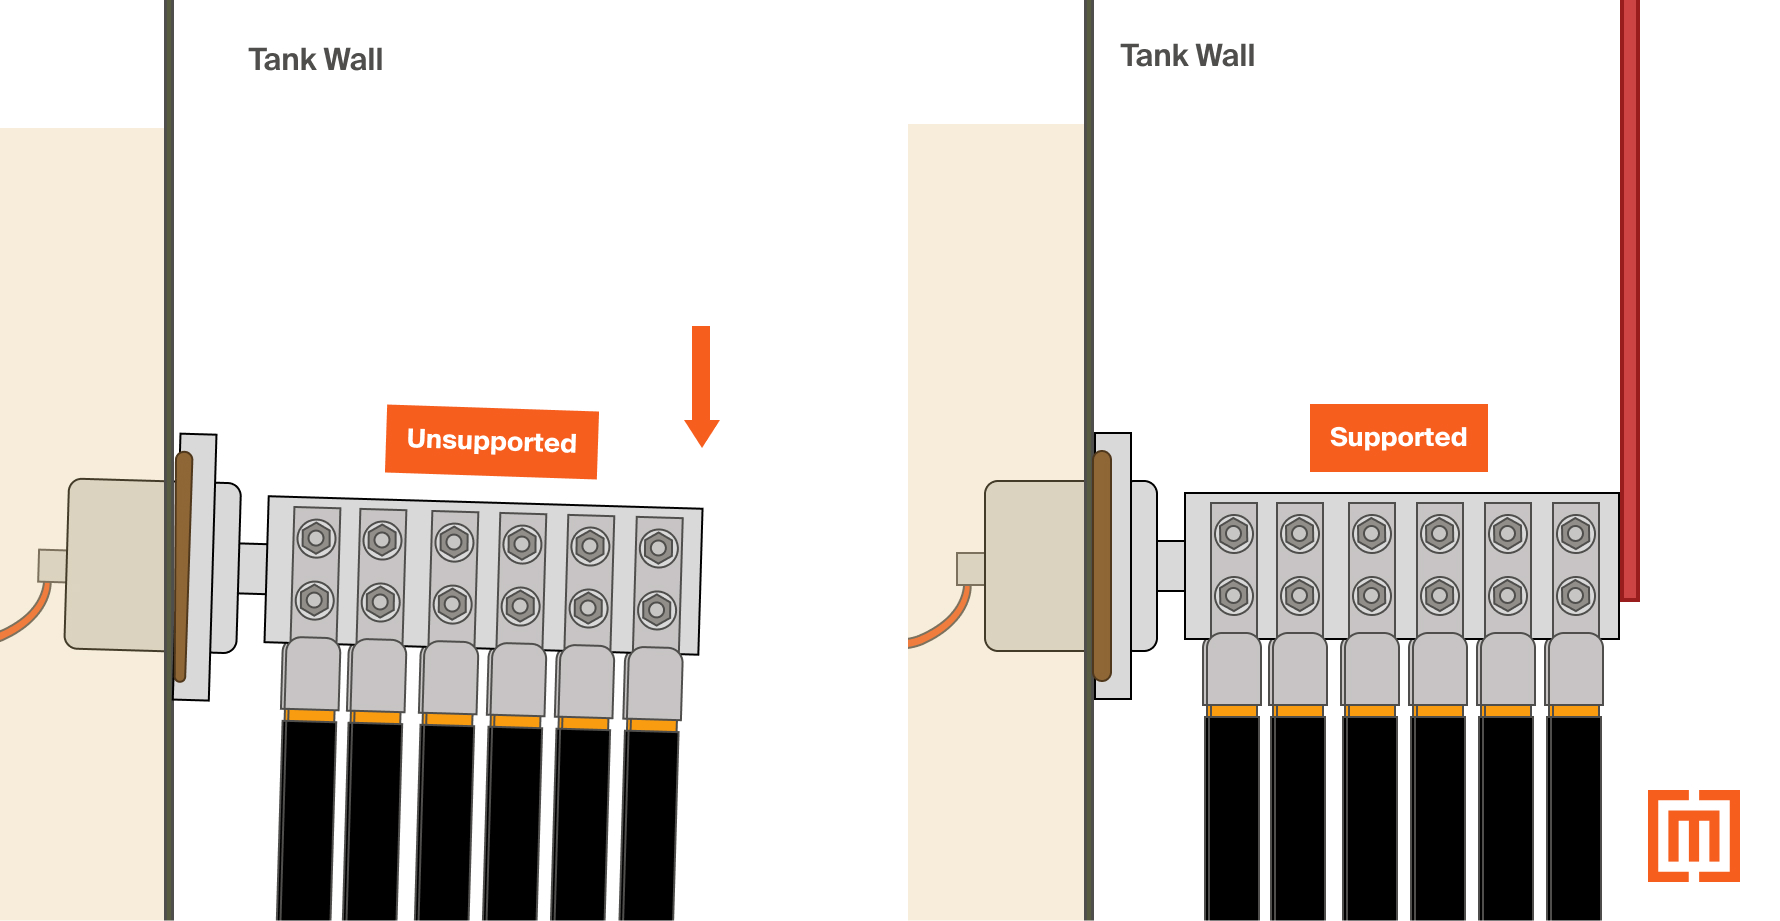
That’s why it’s important to have low-voltage bushing supports. These supports apply upward tension to the bushings. This opposes the downward tension from the cables and relieves the strain on the bushing assembly. This helps prevent compressed gaskets and bushing leaks.
When should you use bushing supports
You should add supports to any bushing that has eight or more cables attached to it. Maddox includes bushing supports for any transformer large enough to need them. Not all manufacturers do this though.
This article will provide a step-by-step process on how to install LV bushing supports. Feel free to watch the video below or keep reading.
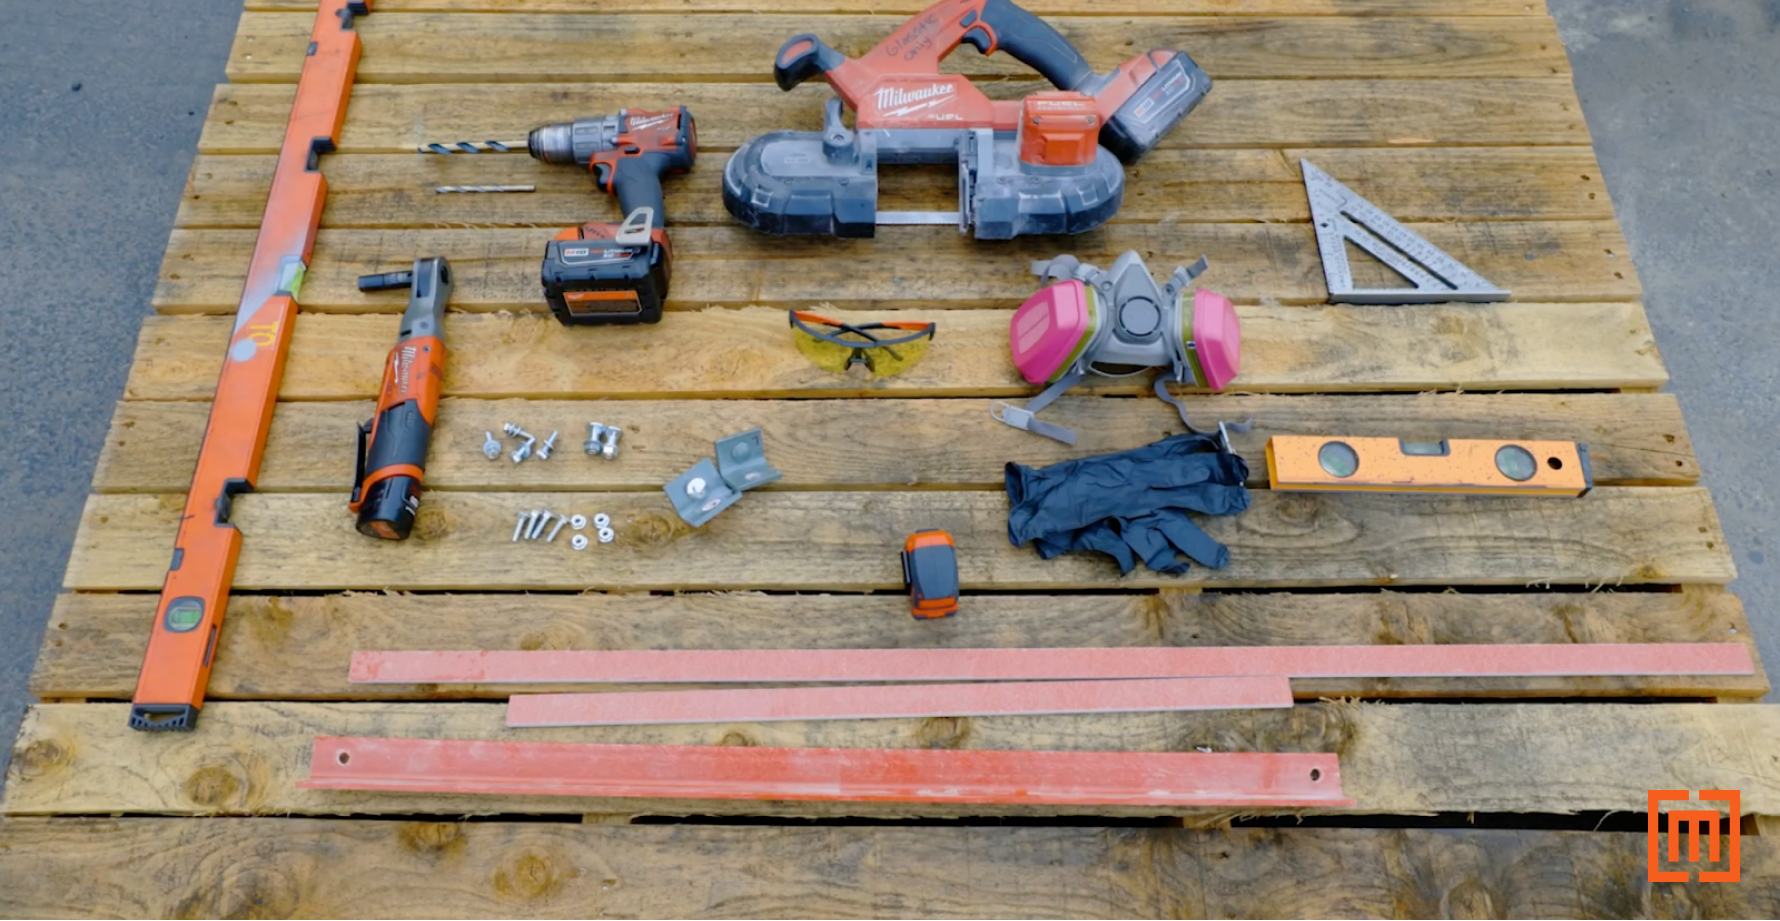
Tools and Materials for the project:
- Glastic Material
- Level
- Wrench
- Drill & Bits
- Saw
- 3/8’’ Carriage Bolts
- 1/4’’ Carriage Bolts
- Flange Nuts
- Safety Equipment: Gloves, Glasses, Respirator
- Speed Square
Installation Process
1. Measure Cabinet Width
First, measure the width of the low voltage side of your padmount cabinet.
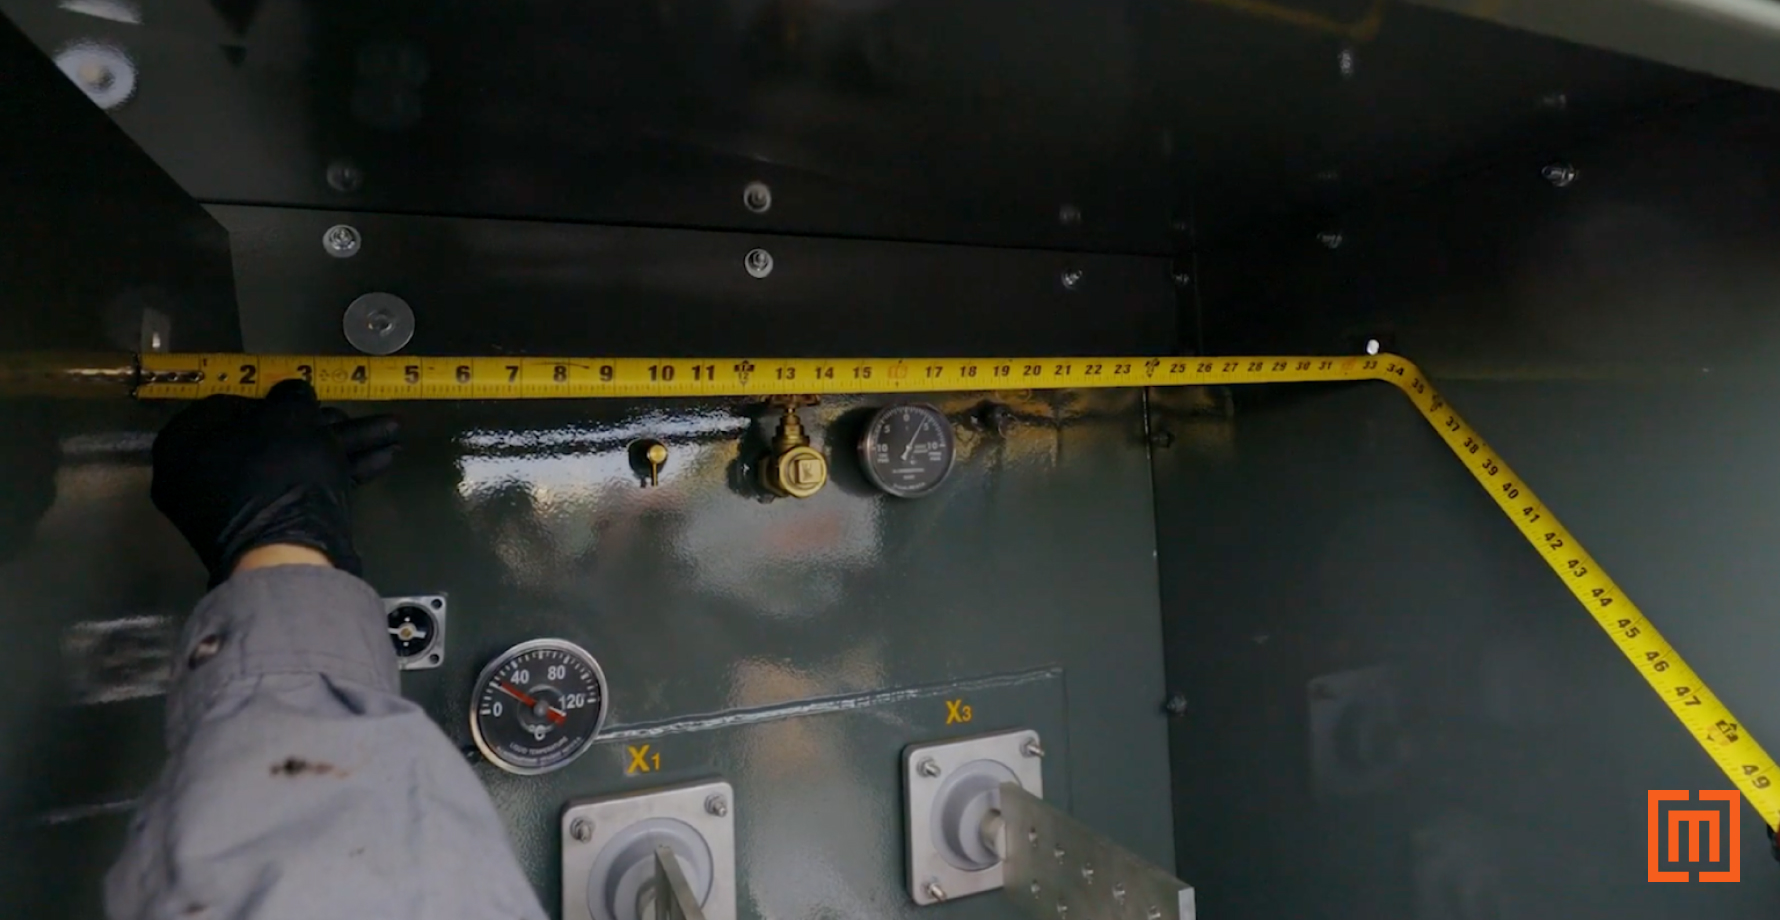
Ensure the height of your cross brace will not cover access or viewing to any gauges.
2. Cut Cross Brace
Take your measurement of the cabinet width and mark it on a piece of angled glastic. Then cut the glastic at your marks. This will be your cross brace.
3. Measure and Cut Glastic Wedges for Supports
Next measure and cut two, 2” wide sections of angled glastic material. These two wedges will serve as supports for your cross brace.
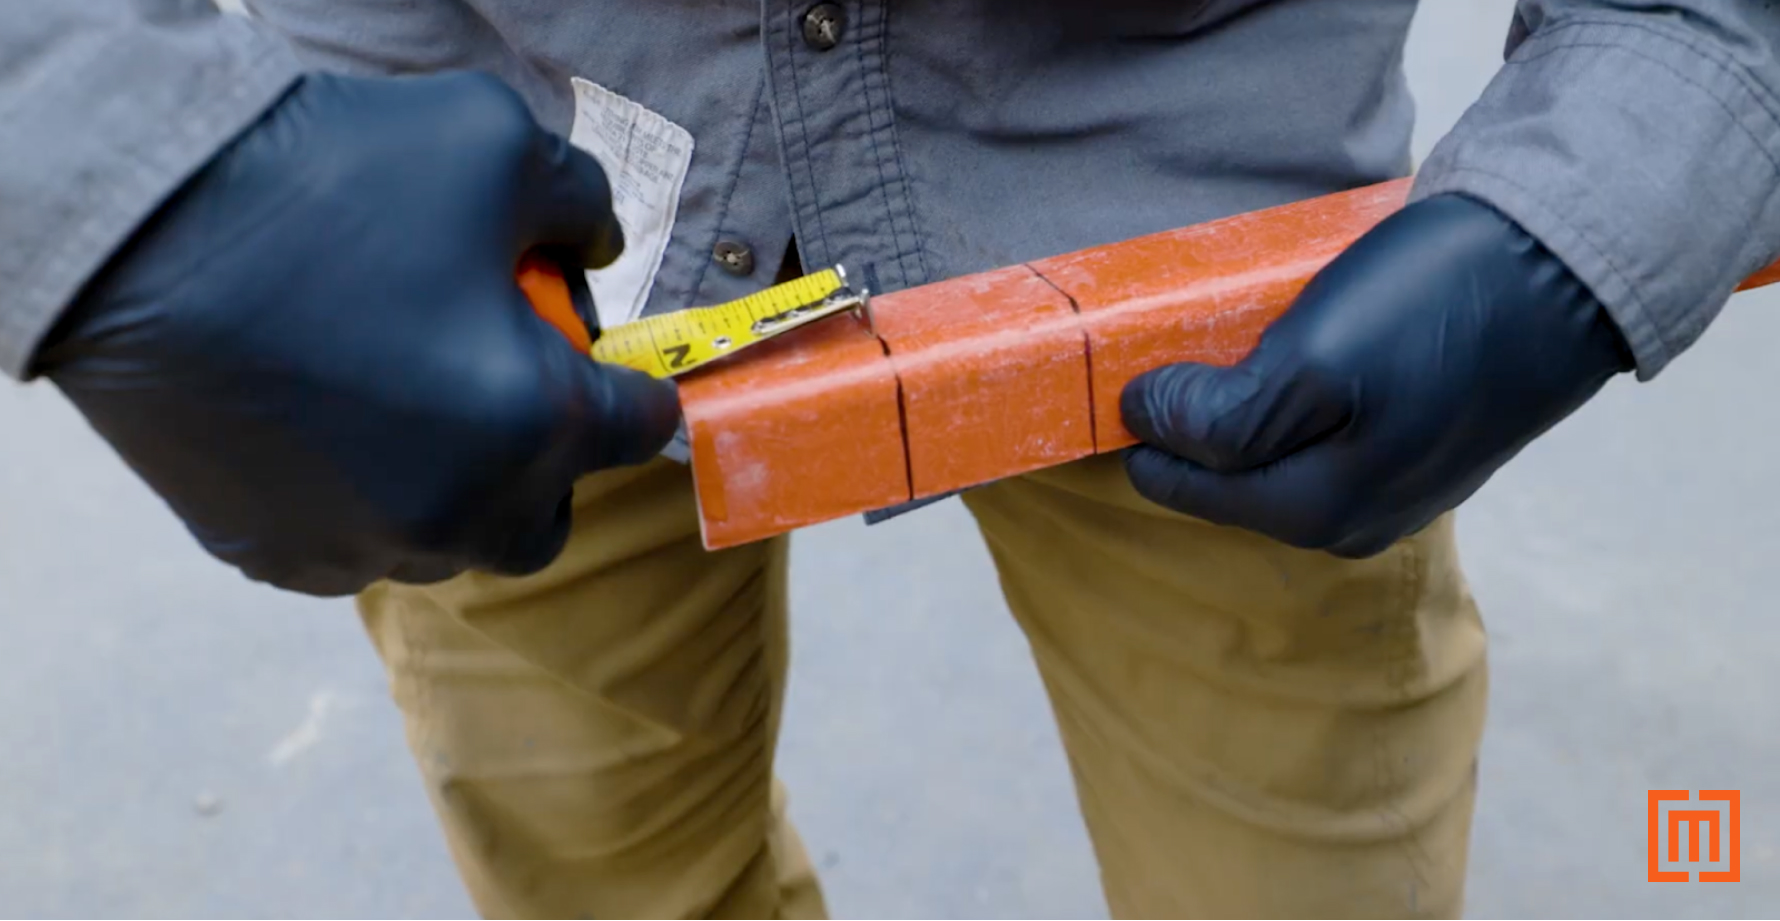
Then, mark the middle of each side of these glastic wedges.
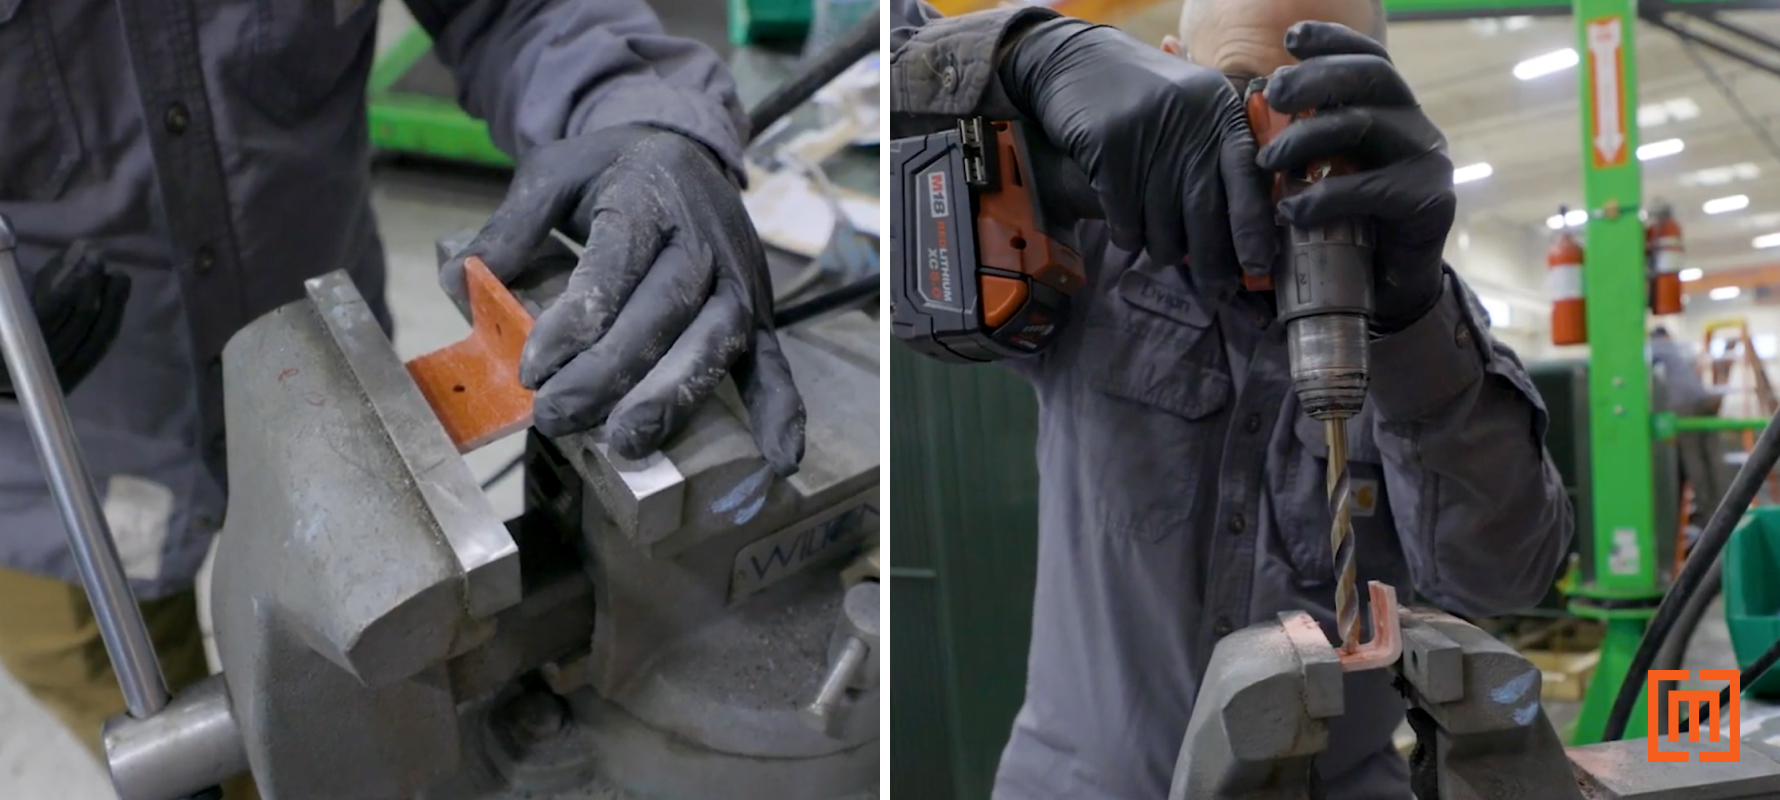
4. Drill Glastic Wedges
Take the larger 3/8” drill bit and drill a hole into the center mark of each of the wedge’s sides.
5. Ensure Bracket is Flush
Flush the wedges to the end of your cross brace. Then, drill a hole through the cross brace and bolt them together. Repeat this step on the other side of your cross brace. They will support the underside of your brace. Make sure your support wedge is flush with the end of the cross brace.
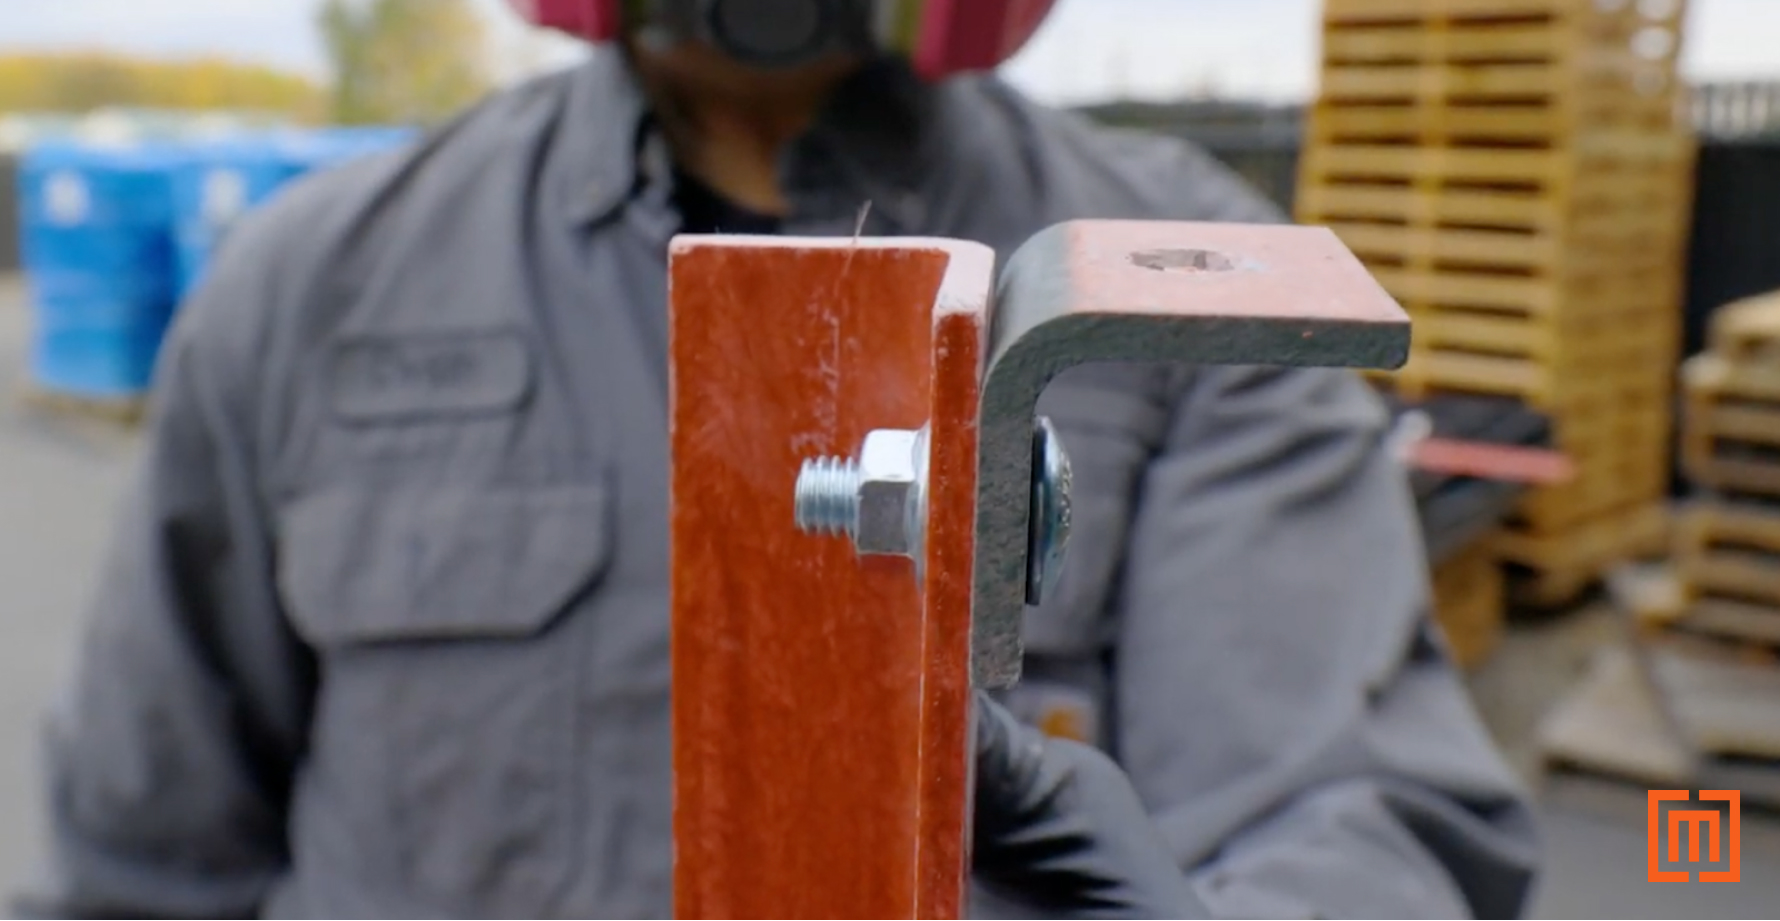
6. Dry Fit the Brace
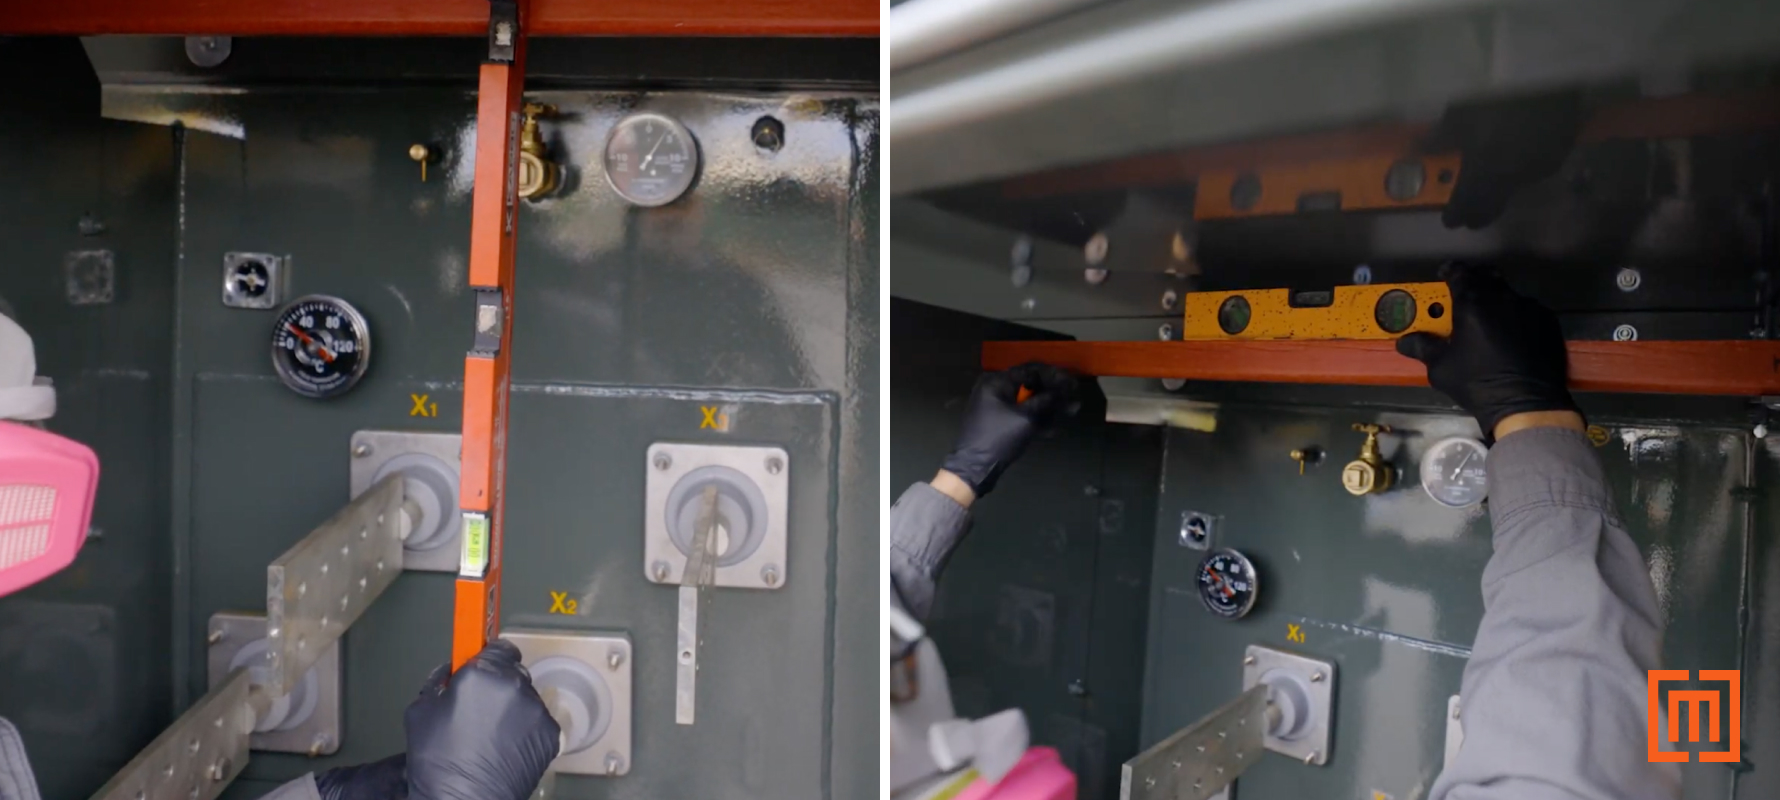
Dry fit the brace into the cabinet. Keep in mind that you do not want to cover any of your transformer’s gauges.
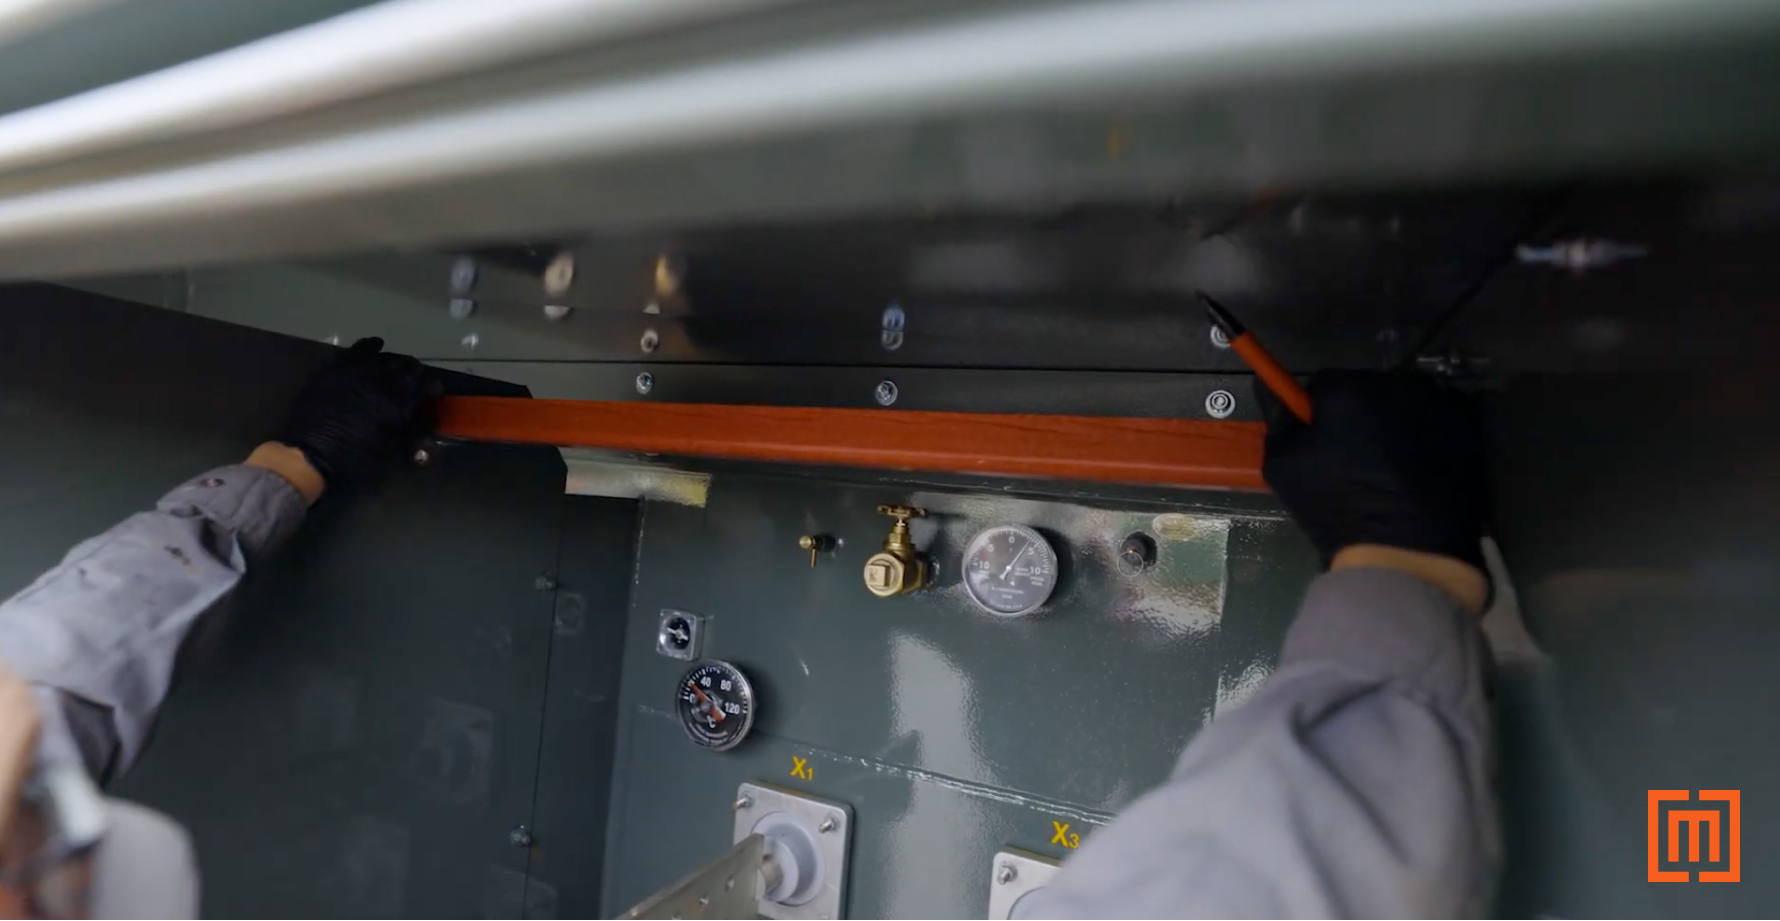
Ensure the cross brace is level horizontally. Then, level it down to each bushing spade to make sure it is perpendicular.
7. Mark Cabinet Holes
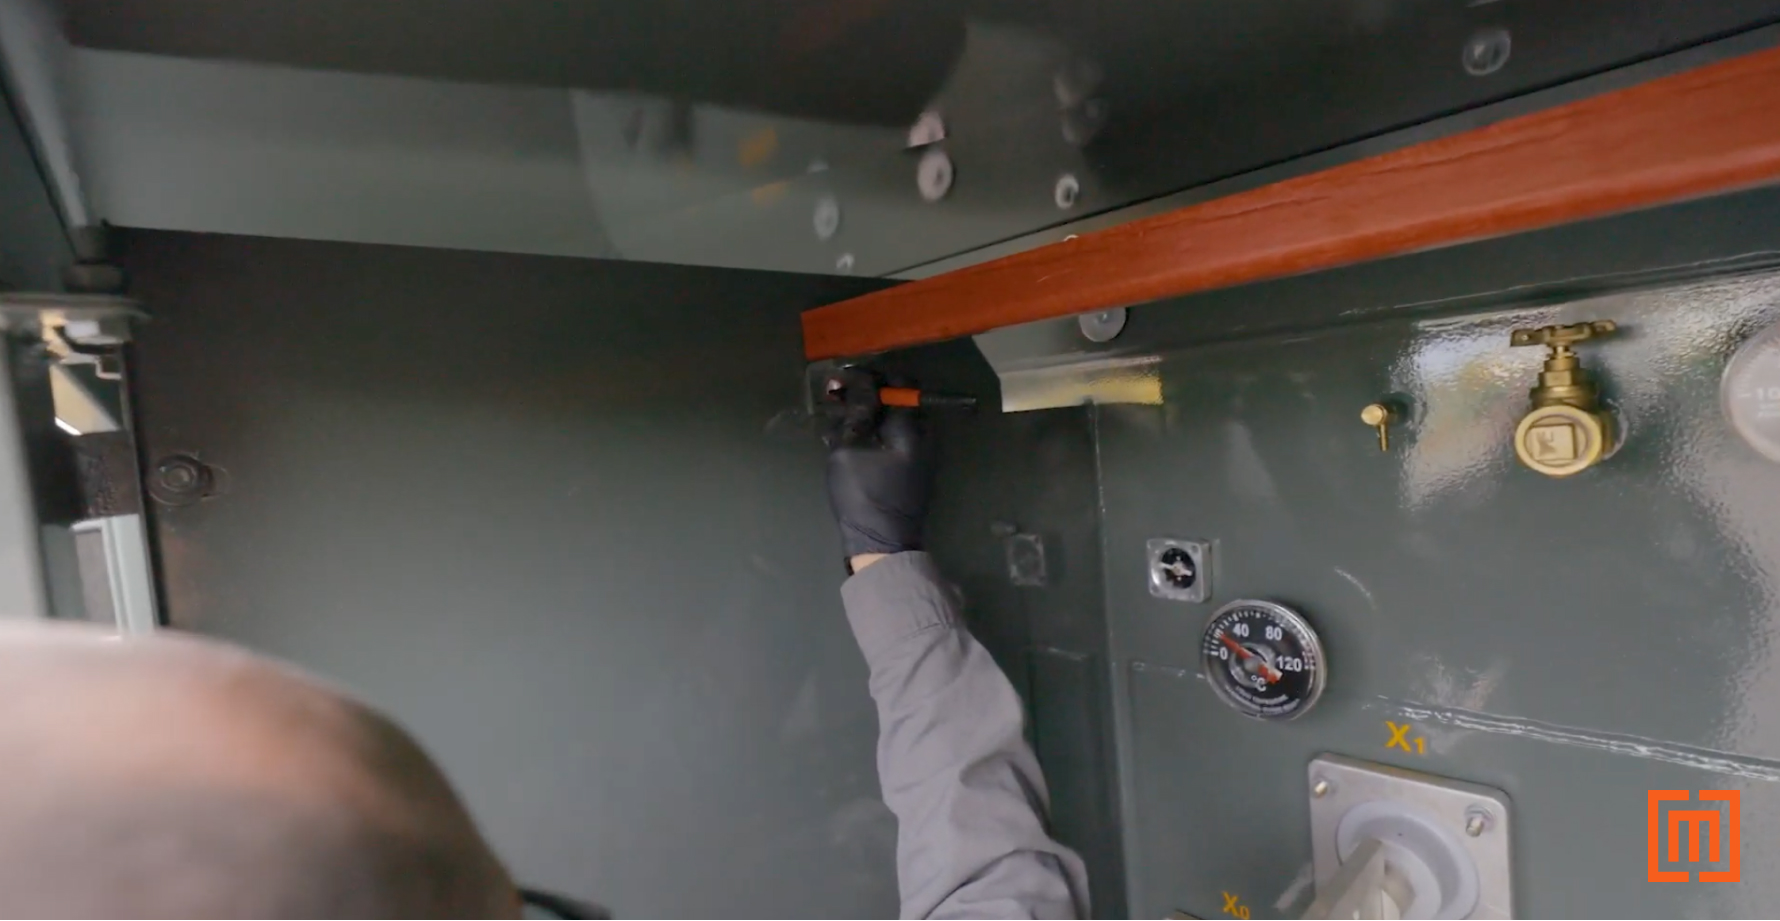
As you dry fit the brace, mark where the holes in your support wedges line up in the sides of the cabinet.
8. Drill Through Cabinet
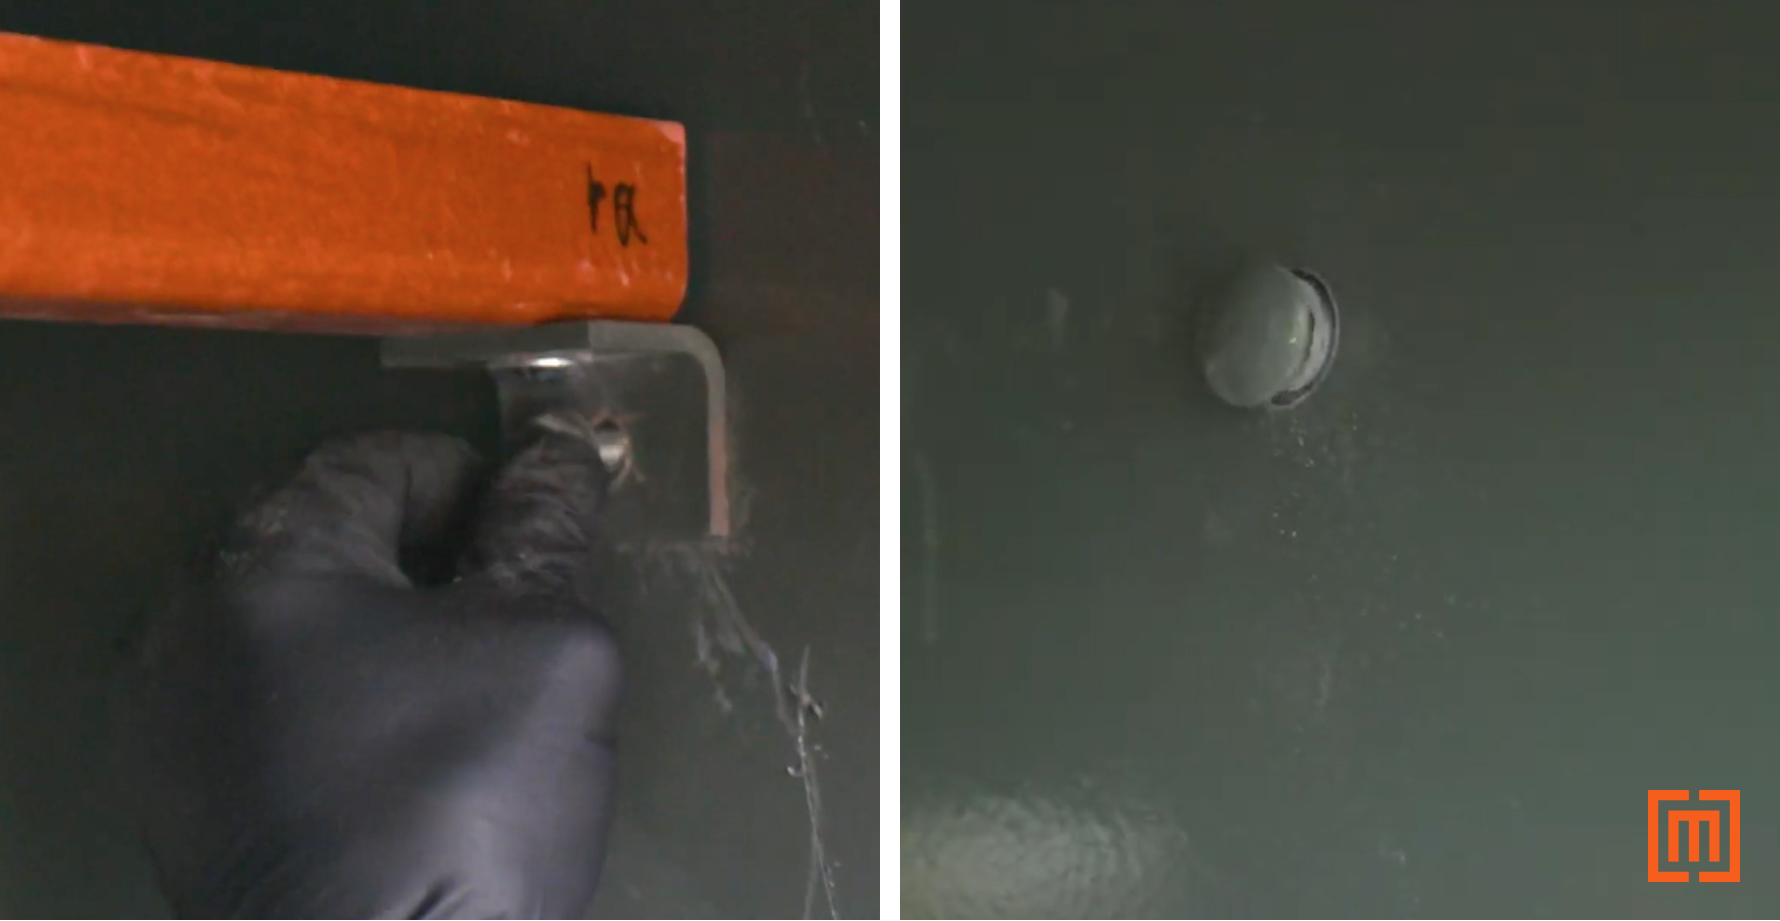
Drill through the sides of your cabinet. Feed a 3/8’’ carriage bolt through the hole. Bolt the bracket to the side of the cabinet using a flange nut.
9. Measure Glastic Supports
Measure down from your cross brace to the center of your bushing spade.
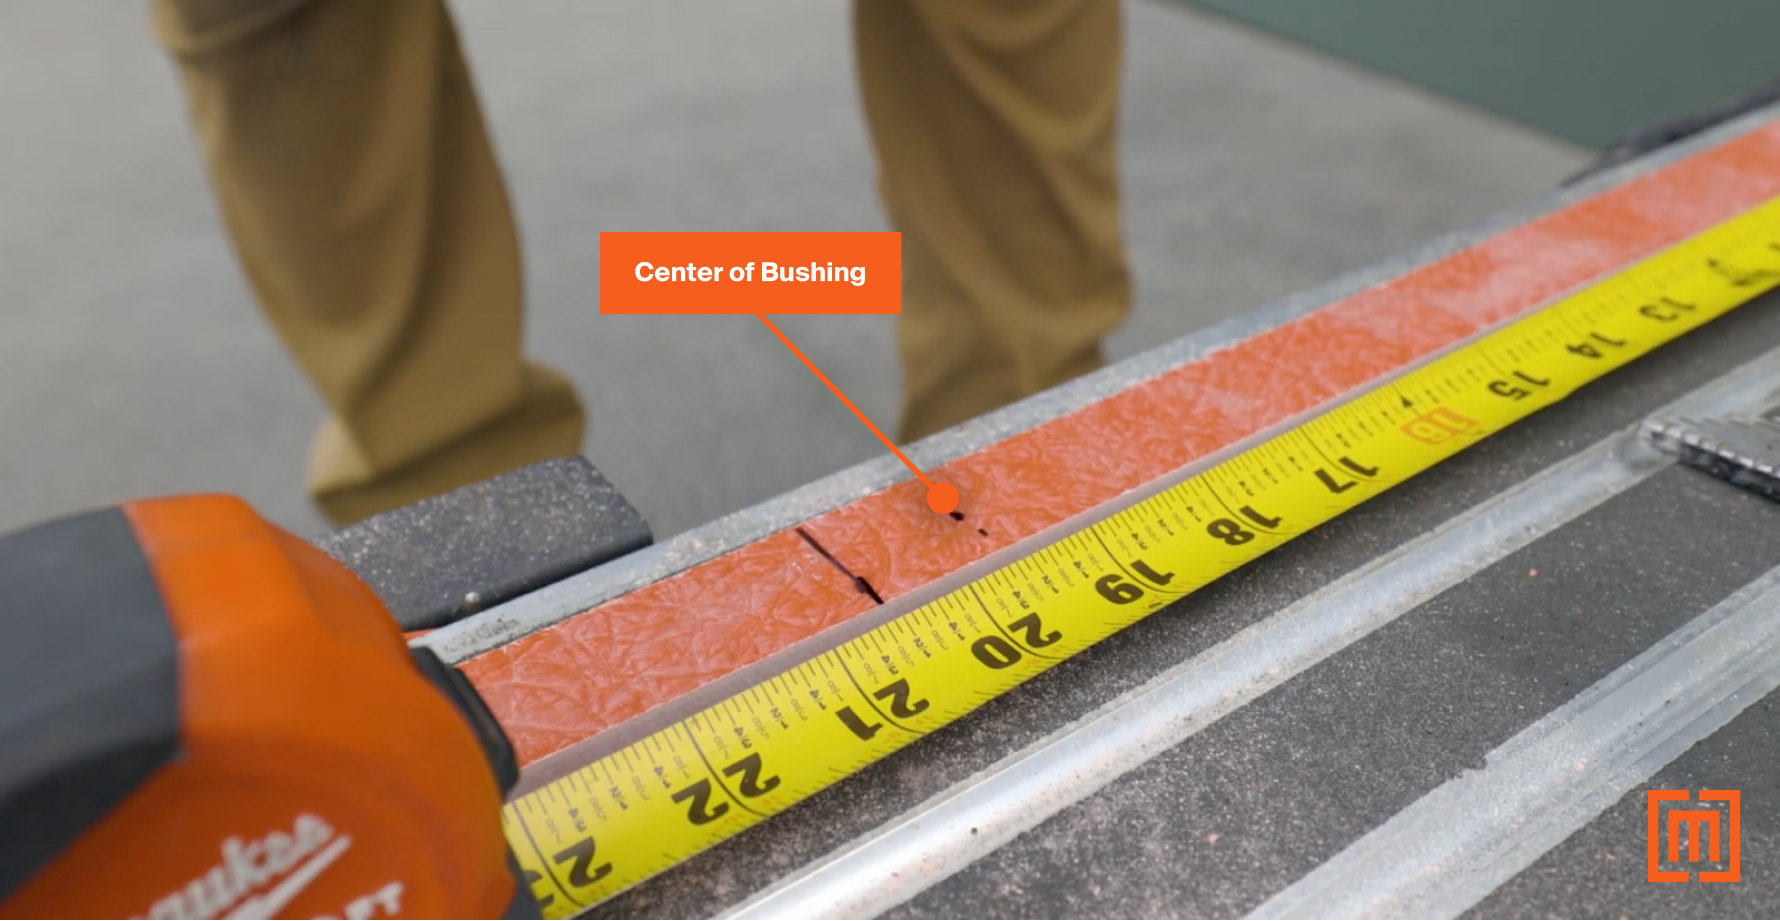
Add 1” to that measurement and transfer the measurement to your glastic piece. You should now have two marks: a point where the center of the bushing spade will be and a line one inch below that point.
10. Drill & Cut Glastic
Use the smaller ¼” drill bit to drill through the point that marks the center of the bushing.
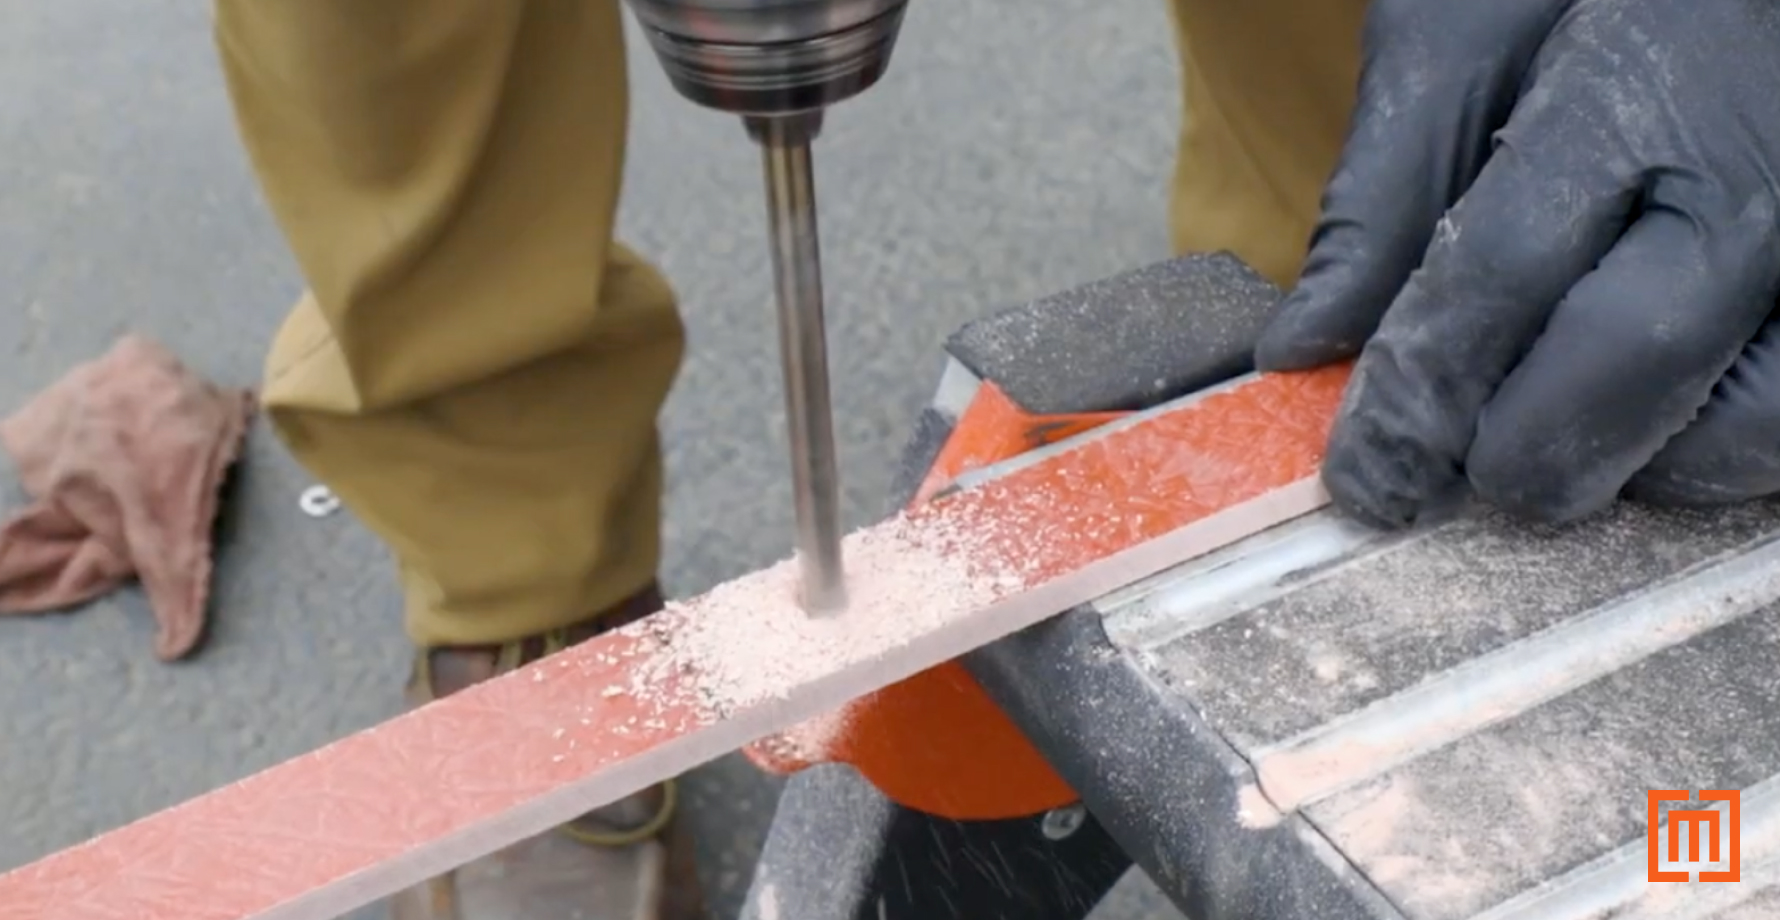
Then cut the glastic strip at the line marked 1” below your drill hole.
11. Secure Support to Bushing
Grab a ¼” bolt with a lock washer and normal washer. Bolt and secure the support into your bushing spade.
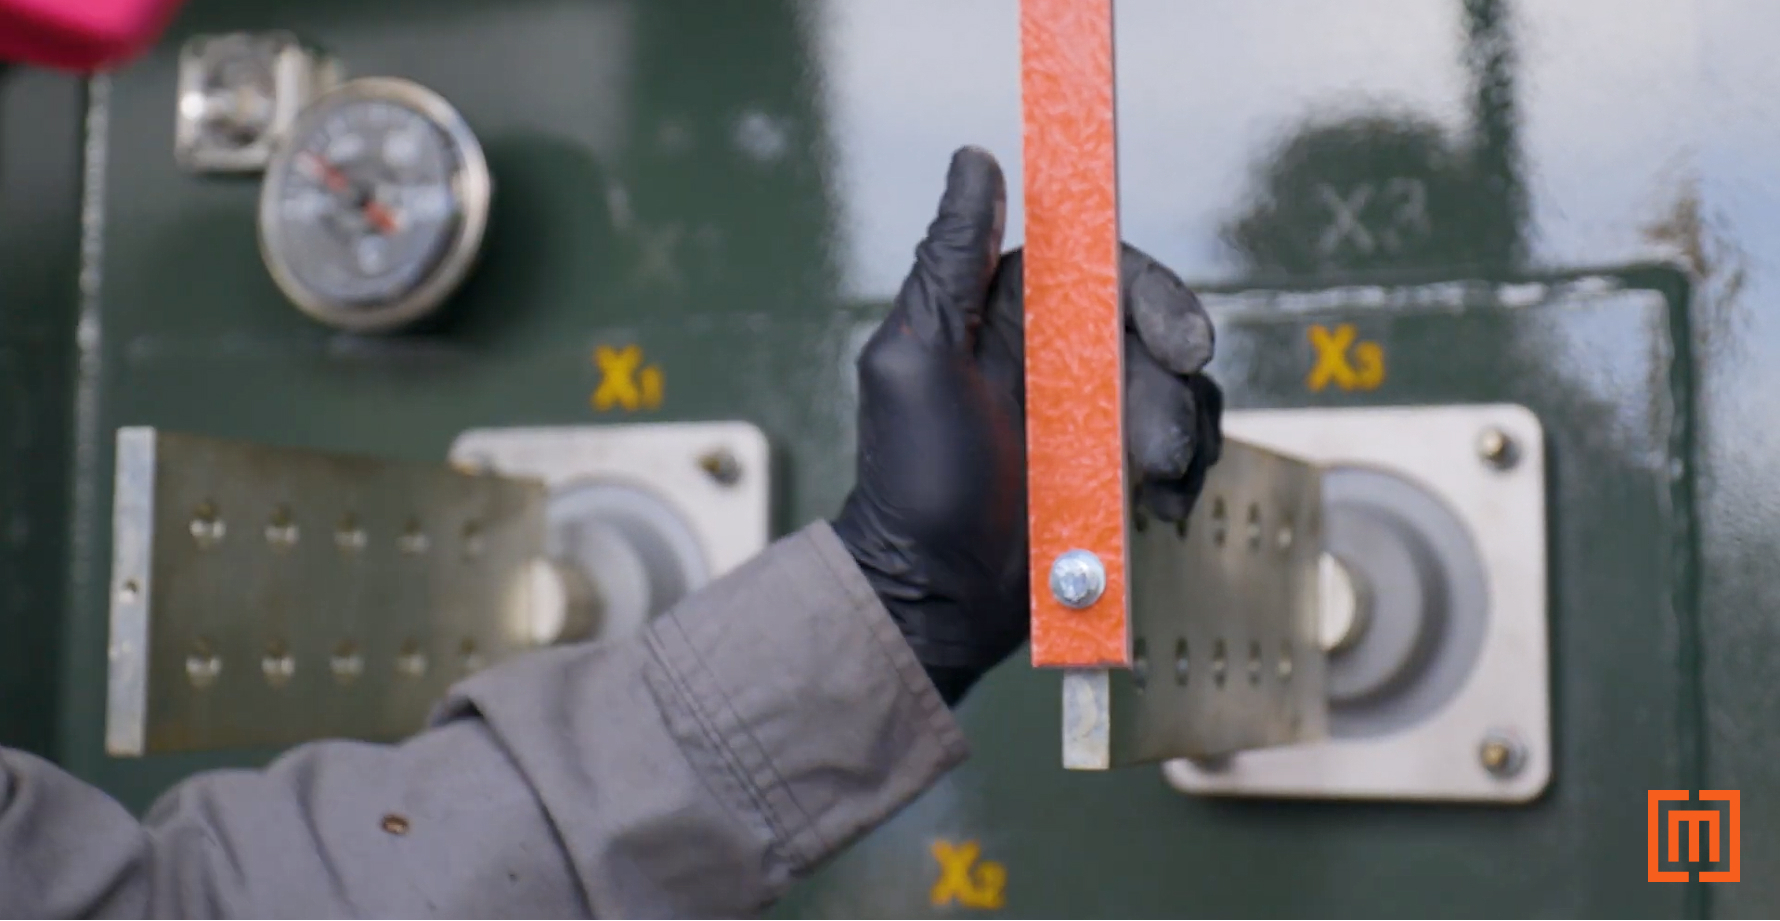
Use a speed square or level to ensure that your vertical piece is perpendicular to the cross brace.
12. Secure Support to Crossbrace
Use the smaller drill bit to drill through both your support piece and the cross brace. Take the ¼” carriage bolt and a flange nut and bolt the two together.
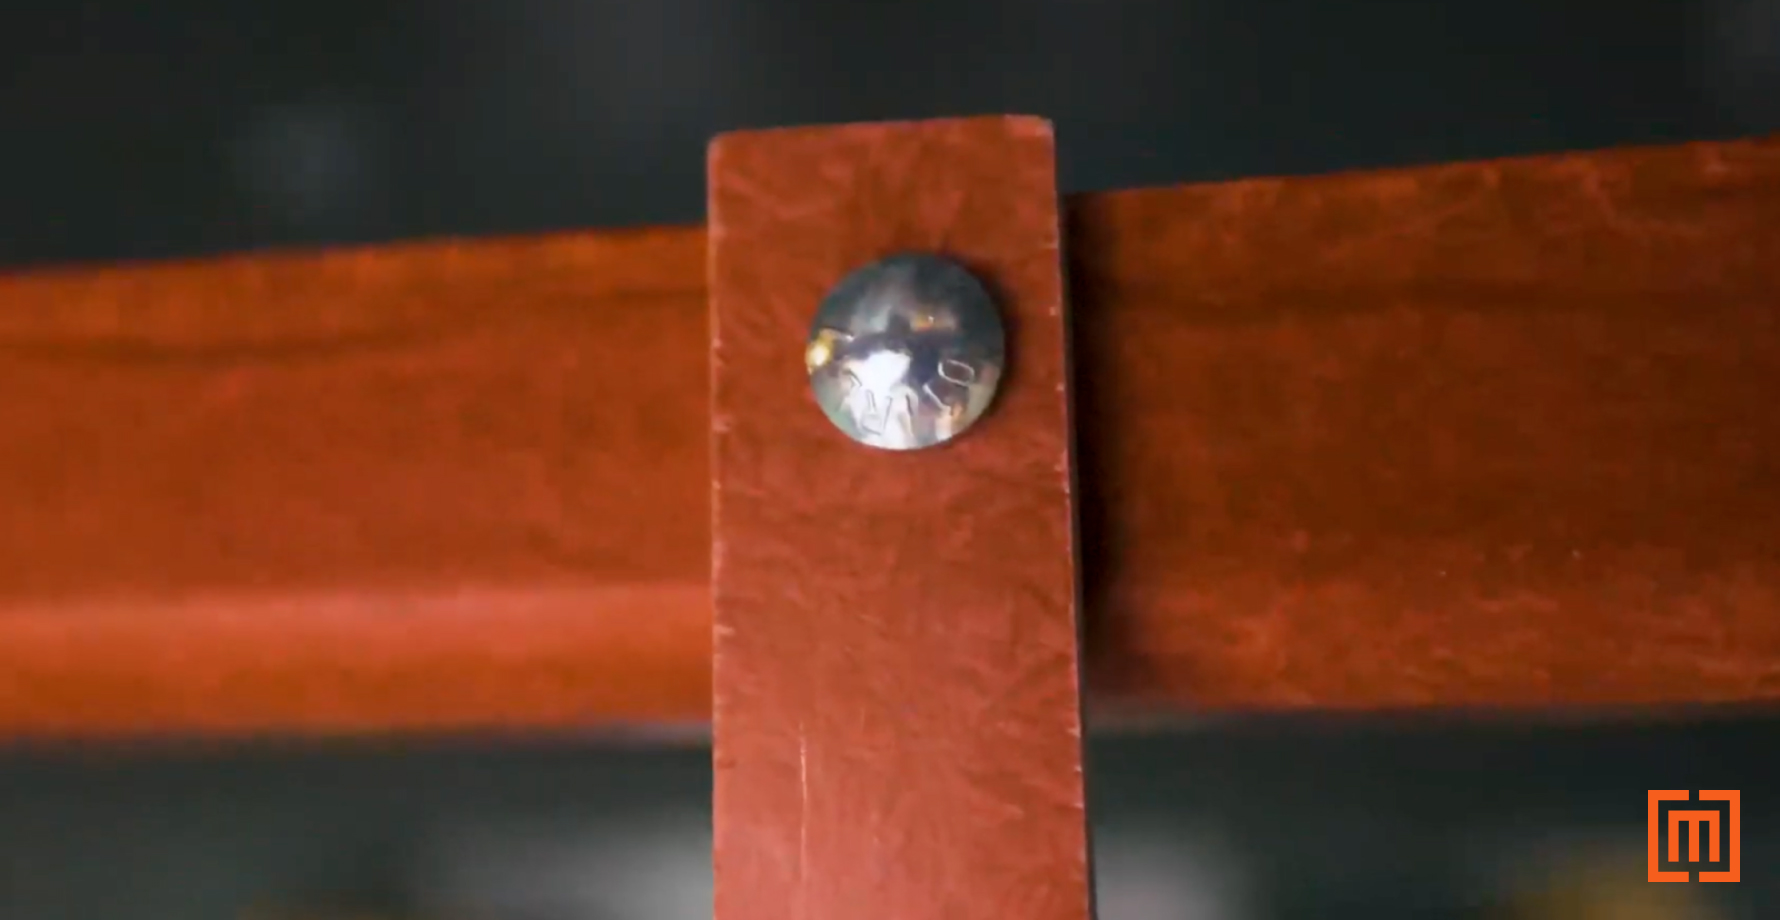
13. Repeat Steps 9 - 12
Repeat the above process of installing supports for the remaining spades. Install each support perpendicular to your cross brace.
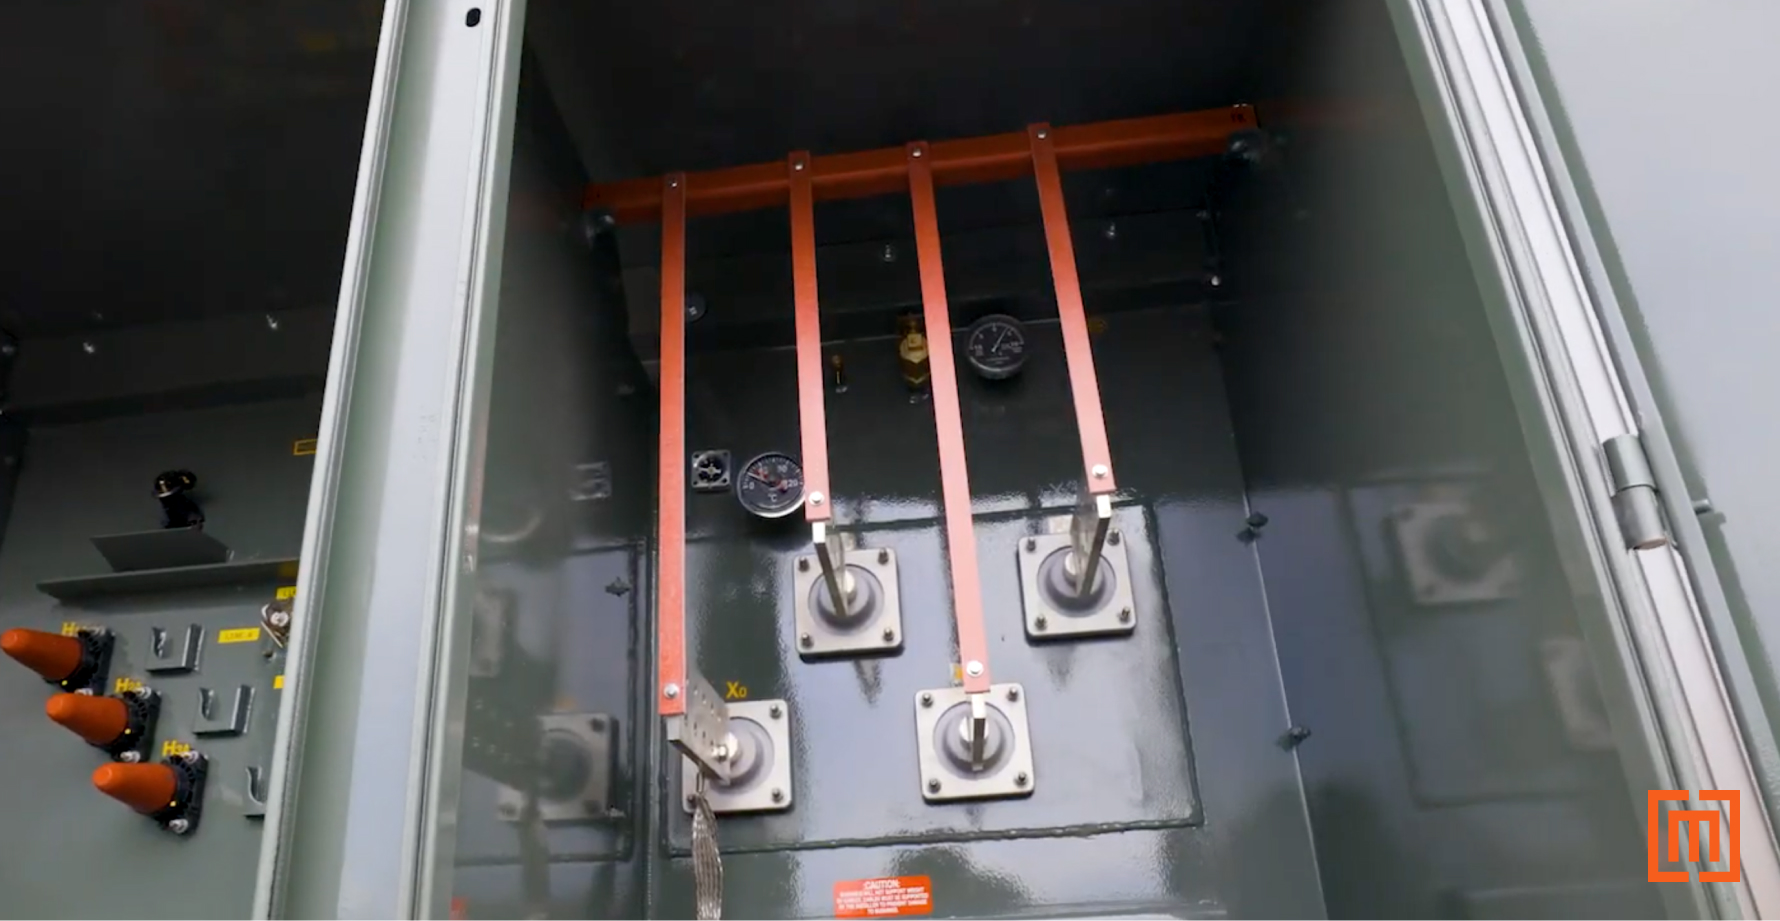
14. Clean Up
Once your braces are installed, take a rag and clean up any glastic dust settled in your transformer. Check each support and confirm that it is tight and secure.
Conclusion
Consider low voltage bushing supports if you have a transformer with more than eight cables on a spade. They help keep your gaskets from failing and your bushings from leaking.
We hope you found this article helpful. Maddox is your one stop shop for all your transformer needs. If you need to purchase a transformer, fill out the form below. With hundreds of transformers in stock, we have the transformer you need for your next project.

